Have you ever found yourself stranded with a flat tire, unsure of how to get back on the road? The right tools and knowledge can turn a frustrating experience into a manageable challenge. Here’s what you’ll learn about essential bike flat repair tools and techniques.
What You Will Learn
- The essential tools you need for effective bike flat repairs, including tire levers, pumps, and patch kits.
- Differences between tubed and tubeless tires and how they impact repair strategies.
- Common accessories that can enhance your flat tire repair experience, such as tire sealants and multi-tools.
- Step-by-step guidance on how to safely remove a wheel, inspect for damage, and decide between patching or replacing an inner tube.
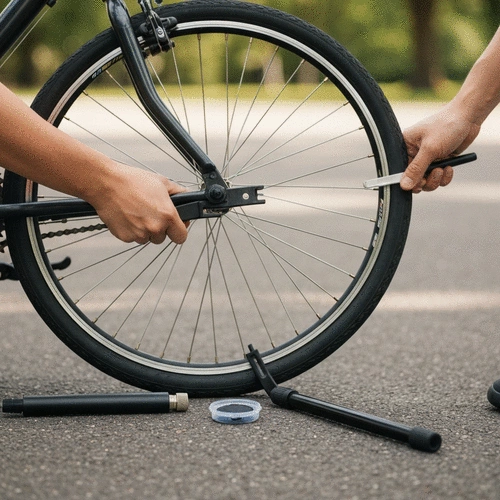
Essential Bike Flat Repair Toolkit and Tire Valve Comparison
This visual outlines the crucial tools for bike flat repairs and differentiates between common tire valve types to help you prepare effectively. For more comprehensive guidance on keeping your bike in top shape, check out our basic bike maintenance tips for beginners.
Essential Tools for Flat Repair
Tubed vs. Tubeless Tires
Tubed Tires
Easier to patch, inner tube replacement for large punctures.
Tubeless Tires
More finesse, sealant can automatically plug small holes.
Valve Types: Schrader vs. Presta
Schrader Valves
Wider, resemble car valves, easier to inflate, common on mountain bikes.
Presta Valves
Narrower, better seal, common on road bikes, special adapter needed.
Essential Tools for Your Bike Flat Repair Journey
When it comes to tackling a flat tire, having the right tools at your disposal can make all the difference! At Bike Tips Hub, I’ve learned that being prepared not only saves time but also boosts your confidence on the road. Here’s a list of essential tools you should gather for your bike flat repair:
- Tire levers: These help you remove the tire from the rim without damaging it.
- Pump: A reliable pump is crucial for re-inflating your tire, whether it's manual or a portable electric version.
- Patch kit: This is essential for fixing punctures rather than replacing the entire tube.
- Rubber cement: Use this with patches to ensure a secure bond.
- New inner tube: Always good to have a spare tube handy, just in case!
Having these tools on hand can turn a stressful situation into a manageable one. Remember, the right equipment paves the way for a smoother repair process!
Gathering Your Repair Toolkit
So, you’ve got your list of tools—great! But let’s dive a little deeper into what each tool does and why it's important. For example, tire levers come in various shapes and sizes, but they all serve the same purpose: removing your tire. Investing in sturdy levers can save you a lot of frustration during tire changes!
Additionally, a quality pump is non-negotiable. Whether you're using it at home or taking a portable version on rides, make sure it's compatible with your valve type—more on that shortly! Together, these tools create a toolkit that prepares you for almost any flat tire scenario. To further enhance your preparedness, consider learning about mastering bike riding basics, which includes essential skills for handling unexpected situations.
Understanding Tire Types: Tubeless vs. Tubed
Flat repairs can vary significantly depending on your tire type. Tubed tires are more straightforward to repair with patches, while tubeless tires have their own set of challenges. With tubeless tires, you're often dealing with sealant, which can help prevent flats in the first place!
Here’s a brief comparison of the two:
- Tubed Tires: Easier to patch, but you'll need to replace the inner tube for large punctures.
- Tubeless Tires: Require a bit more finesse; sealant can often plug smaller holes automatically!
Understanding these differences is key to knowing how to approach repairs effectively. I’ve had my fair share of both types, and learning the nuances has made me a more confident cyclist!
Common Bicycle Accessories for Flat Tire Repairs
In addition to the basic toolkit, there are several accessories that can make flat tire repairs much simpler. Investing in a few handy items can take your repair game to the next level!
- Tire sealant: This can prevent flats before they happen, especially for tubeless setups.
- Repair stands: A stand can hold your bike in place while you work, making the entire process easier and more effective.
- Multi-tools: These can combine several tools, which saves space and ensures you're prepared for various repairs.
Having these accessories at your disposal means you won’t just be fixing flats—you’ll be ready for anything the road throws at you! Remember, preparation is key to enjoying your cycling adventures.
Pro Tip
Did you know? Regularly checking your tire pressure can significantly reduce the chances of experiencing a flat. Aim to check your tires before each ride, ensuring they are inflated to the recommended PSI printed on the sidewall. This simple habit can enhance your riding efficiency and safety!
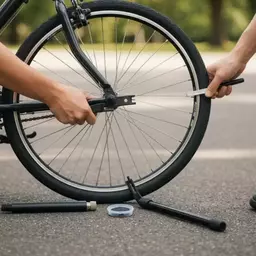
Step-by-Step Guide to Fixing a Flat Tire on Your Bike
When you find yourself with a flat tire, it can feel overwhelming. However, having a clear step-by-step process can make the repair manageable! Let’s walk through the essential steps to get you back on the road in no time.
Removing the Wheel for Access
First things first, you'll need to remove the wheel to access the tire. Here’s how to do it safely:
- Shift your bike into the lowest gear to relieve tension on the chain.
- Use your quick-release lever or a wrench to loosen the axle nuts or bolts.
- Carefully lift the bike and slide the wheel out of the dropouts.
Make sure to handle the bike gently to avoid any damage. A tip from my experience: always check that the brakes are released, so the wheel slides out easily!
Inspecting the Tire: Identifying the Cause of the Flat
Once the wheel is off, it’s time to inspect the tire for any signs of damage. Look for:
- Punctures or tiny holes
- Sharp objects embedded in the tire, like nails or glass
- Signs of wear or cracking on the tire surface
Identifying the cause of the flat is crucial. If you find a puncture, make sure to check the inner tube for air leaks too. This step will help you avoid future flats!
Understanding Valve Types: Schrader vs. Presta
Different bikes come equipped with two types of valves: Schrader and Presta. Understanding these is essential for your repair:
- Schrader valves are wider and resemble car tire valves. They are easier to inflate and are commonly found on mountain bikes.
- Presta valves are narrower and often found on road bikes. They require a special adapter for inflation but provide a better seal against air leaks.
Knowing your valve type not only aids in the repair process but also ensures you have the right pump on hand when you need it! Additionally, understanding your bike's components is part of essential bike chain care, which helps prevent other common cycling issues.
Deciding on Patching vs. Replacing the Inner Tube
At this stage, you’ll need to decide whether to patch the inner tube or replace it entirely. Here are some guidelines to help you choose:
- Patch if the puncture is small (less than 1/4 inch) and located away from the seam.
- Replace if the tube has multiple holes or is damaged beyond repair.
- Consider replacing the inner tube if it’s old or shows signs of wear.
Making the right choice here can save you headaches down the line, so think it through! Trust me, I’ve learned this the hard way.
Patch Application: A Quick How-To
If you choose to patch, follow these steps:
- Clean the area around the puncture with a little sandpaper.
- Apply rubber cement and let it sit for a few minutes until tacky.
- Carefully place the patch over the hole and press down firmly.
Make sure the patch is fully adhered before reinflating the tube. It's a simple process, but doing it right is key to avoiding future flats!
Tube Replacement Steps for When Patching Isn’t Enough
Here’s how to replace the inner tube safely:
- Remove the tire from the rim using your tire levers.
- Take out the old tube and insert the new one, making sure the valve aligns properly.
- Carefully fit the tire back onto the rim, ensuring the tube isn’t pinched.
Taking your time during this process can prevent issues later and ensure a smooth ride next time!
Reinstalling the Wheel: Ensuring a Secure Fit
- Slide the wheel back into the dropouts, making sure it’s seated properly.
- Secure the axle nuts or quick-release lever tightly.
- Check that the brakes are functioning correctly and that the wheel spins freely.
Double-checking everything before you ride off is always a good idea. You want to hit the road with confidence!
Frequently Asked Questions About Bike Flat Repair
What are the essential tools for fixing a flat bike tire?
The essential tools include tire levers, a pump, a patch kit, rubber cement, and a new inner tube (as a spare).
What is the difference between tubed and tubeless tires for repair purposes?
Tubed tires are generally easier to patch, but large punctures require replacing the inner tube. Tubeless tires often have sealant that can automatically plug small holes, but larger repairs might require more finesse or specific tubeless repair kits.
What are Schrader and Presta valves?
Schrader valves are wider, similar to car tire valves, and common on mountain bikes. Presta valves are narrower, found on road bikes, offer a better seal, and often require a special adapter for inflation.
When should I patch an inner tube versus replacing it?
Patch small punctures (less than 1/4 inch) not near the seam. Replace the inner tube if it has multiple holes, is severely damaged, or shows significant signs of wear and age.
How can I prevent flat tires?
Regularly check your tire pressure before each ride to ensure it matches the recommended PSI. Investing in tire sealant (especially for tubeless setups) can also help prevent flats before they occur.
Recap of Key Points
Here is a quick recap of the important points discussed in the article:
- Essential Tools: Always have tire levers, a reliable pump, a patch kit, rubber cement, and a new inner tube for flat repairs.
- Tire Types: Understand the differences between tubed and tubeless tires to handle repairs effectively.
- Accessories Matter: Consider investing in tire sealant, repair stands, and multi-tools to simplify the repair process.
- Repair Steps: Follow a clear step-by-step guide, from removing the wheel to patching or replacing the inner tube.
- Valve Knowledge: Be familiar with Schrader and Presta valves to ensure you have the right tools for inflation.